When you’re shopping around for someone to hire, you probably try to find samples of their work before you decide to commit. A 2020 study revealed that 48% of consumers say their first interaction with a business plays a large role in determining loyalty. Want to create positive first interactions? Try an image gallery.
Many of our reseller and installer partners don’t just sell accessories; in fact, service-based work helps drive many of their businesses. Spray in bed liners, window tinting, and leather upholstery work are just a few categories that could be showcased with an image gallery, which can display your work in a clean, professional manner and turn leads into loyal customers. In this article, we’ll show you how to use Aftermarket Websites® image grids (with Gallery mode enabled) to make a great first impression.
What’s Different About Gallery Mode?
The main benefit of using gallery mode is the way images behave when clicked. Standard image grids display your images in a grid with a set number of rows and columns. Each of those images, when clicked, will redirect you to a page (or link) of your choosing. The images can not be viewed any larger than what they are displayed in the grid.
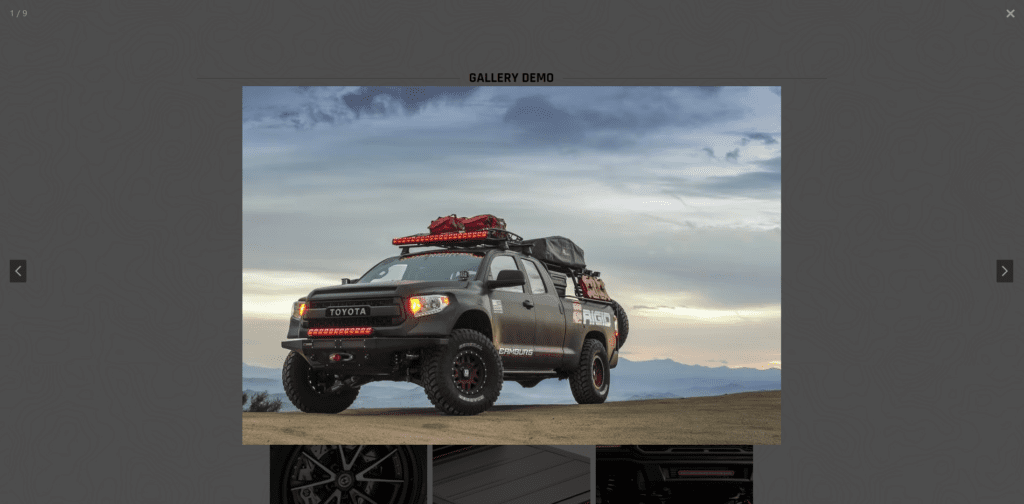
If you’d like to create an image gallery where users can click on an image and that image then be displayed in a larger, pop-up window, then enable Gallery mode. In addition to the images being opened in a pop-up modal, you can then navigate to other images within the same gallery by clicking the previous/next arrows on either side of the image

How to Create an Image Grid with Gallery Mode
Follow the steps below or watch a quick screen recording of how to create an image grid with Gallery mode.
- Log in to your admin panel and navigate to Content > Image Grids
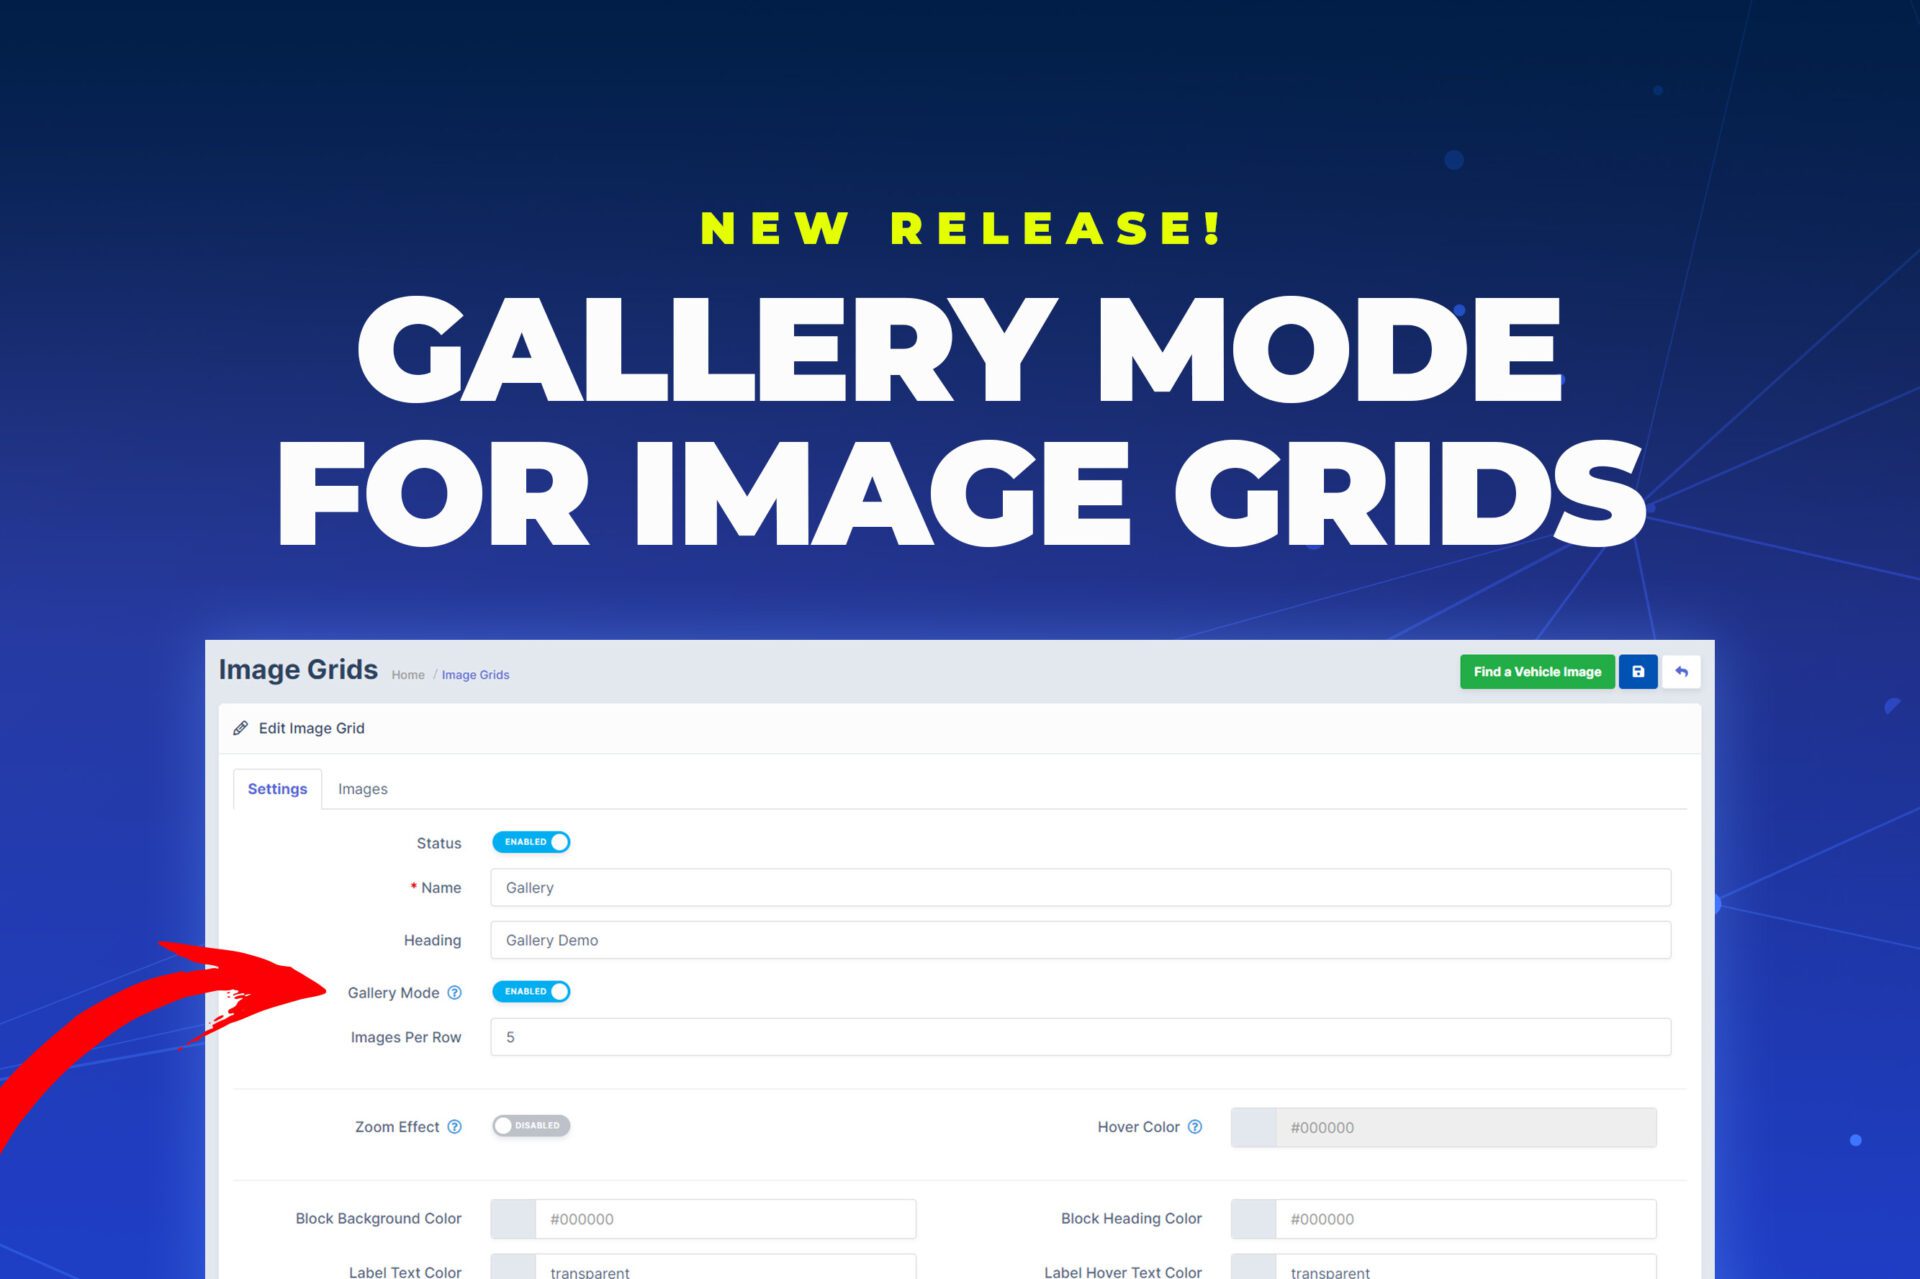
- Add a new image grid, configure settings, and enable Gallery mode
- Add images and labels then save
How to Add a Gallery to a Page
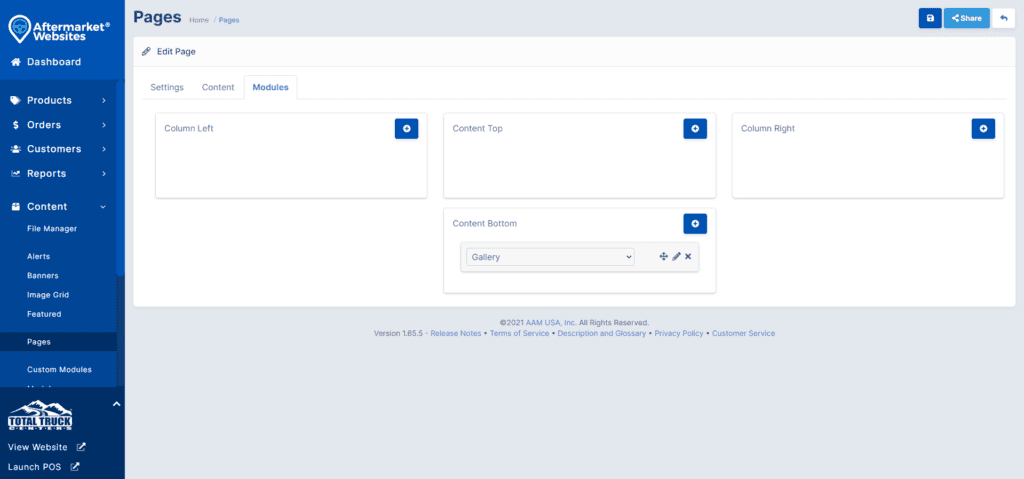
Now that you’ve created and saved an image grid, you can put it on any page by using the drag and drop page builder. Start by navigating to the desired page and clicking the Modules section. Click the + icon in any of the sections and you’ll see the image grid you just created in the drop-down list of options. Select it and save—it’s that easy.

You can add as many images as you want to a gallery and create as many galleries as you want. There is no limit to what you can accomplish with an image grid. So get started making a great first impression with your customers using our image grids with Gallery mode. Don’t have a website for your shop? Click here to schedule a demo and see how Aftermarket Websites® can help you grow your aftermarket accessories business.


